Blog #24
Auto-publish Ruby gem using GitHub Actions
# Introduction
If you're a Ruby gem developer, you know how important it is automate your development process. Manual publishing can be time-consuming and error-prone. Fortunately, GitHub Actions allows you to automate tasks like publishing your Ruby gem to RubyGems.org every time you push a new version to Github. In this blog post, we'll walk through how to set up a GitHub Action to auto-publish your Ruby gem with just a few simple steps.
Why Automate Gem Publishing?
Before diving into the steps, let's quickly discuss why automating the publishing process is beneficial:
Consistency: Automation ensures that your gem is always published the same way with every change, reducing human error.Time-saving: No need to manually run commands or log into RubyGems.org.Version Control:GitHub Actionscan help trigger the publishing process only when there's a new release or tag, keeping your gem versions clean and accurate.Seamless CI/CD: Integrating the publishing process into your CI/CD pipeline helps streamline development workflows.
# Getting started
Step-by-Step Guide to Auto-publish Your Ruby Gem
Let's break down the process into easy-to-follow steps.
Step 1: Create a GitHub Action Workflow
Create .github/workflows/publish_gem.yml into your project.
name: Push gem
on:
  push:
    branches: [ main ]
    paths:
      - 'lib/*/version.rb'
jobs:
  publish_gem:
    name: Push gem to RubyGems.org
    runs-on: ubuntu-latest
    permissions:
      id-token: write # IMPORTANT: this permission is mandatory for trusted publishing
      contents: write # IMPORTANT: this permission is required for `rake release` to push the release tag
    steps:
      # Set up
      - uses: actions/checkout@v4
      - name: Set up Ruby
        uses: ruby/setup-ruby@v1
        with:
          bundler-cache: true
          ruby-version: ruby
      # Release
      - uses: rubygems/release-gem@v1
      - name: Create GitHub release
        run: |
          tag_name="$(git describe --tags --abbrev=0)"
          release_title="Release version ${tag_name}"
          gh release create "${tag_name}" --verify-tag --generate-notes --title "${release_title}"
        env:
          GITHUB_TOKEN: ${{ secrets.GITHUB_TOKEN }}
Step 2: Update Rakefile
Ensure your project includes a Rakefile with Bundler Gem Tasks. If your project does not yet include a Rakefile, you can create one and make sure to add the following line to load Bundler's gem tasks:
require 'bundler/gem_tasks'
Step 3: Update your Gemfile and Gemfile.lock
Ensure your Gemfile includes gem ‘rake'.
$ bundle installEnsure your Gemfile.lock includes x86_64-linux in the PLATFORMS section. If your Gemfile.lock does not yet include x86_64-linux in the PLATFORMS section, you can add it by running the following command:
$ bundle lock --add-platform x86_64-linuxStep 4: Trusted Publishers
Adding a trusted publisher to a gem only requires a single setup step.
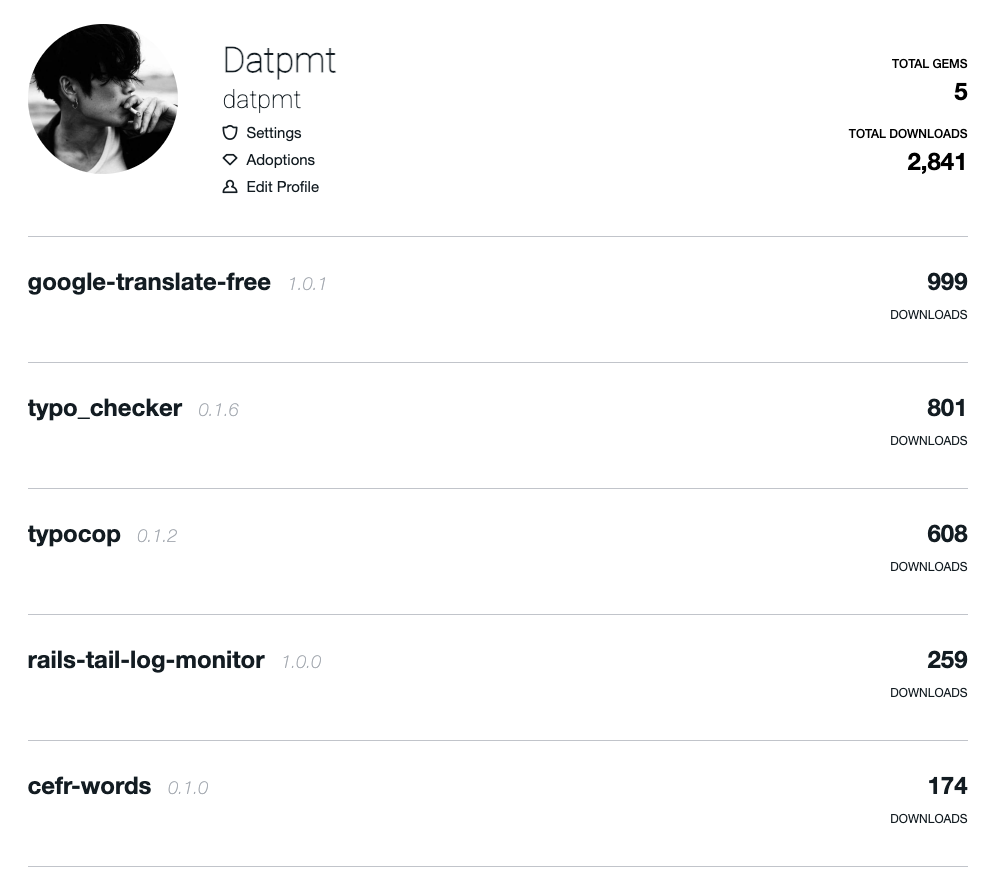
On your profile page, click the link to any gem you’d like to configure.

If you’re a gem owner, you’ll see a link to Trusted publishers on the right side of the page. Click that link.

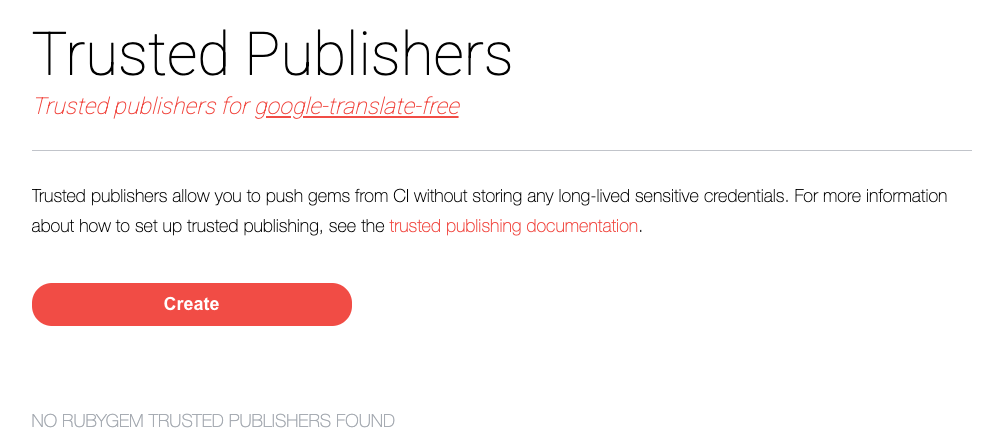
This will take you to the gem’s trusted publishers page.

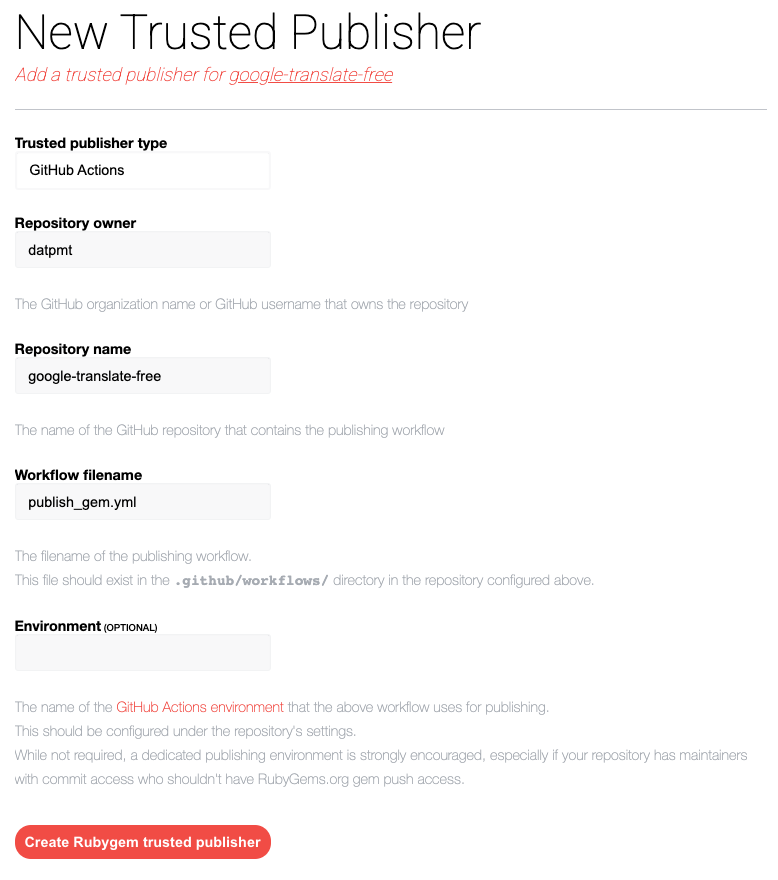
Click the Create button, which will take you to the publisher configuration page.

Providing the owner name, repository name, and GitHub Actions workflow name allows RubyGems to securely accept uploaded gems from the GitHub Actions infrastructure. If you have multiple workflows that push gems, you can create one Trusted Publisher for each workflow.
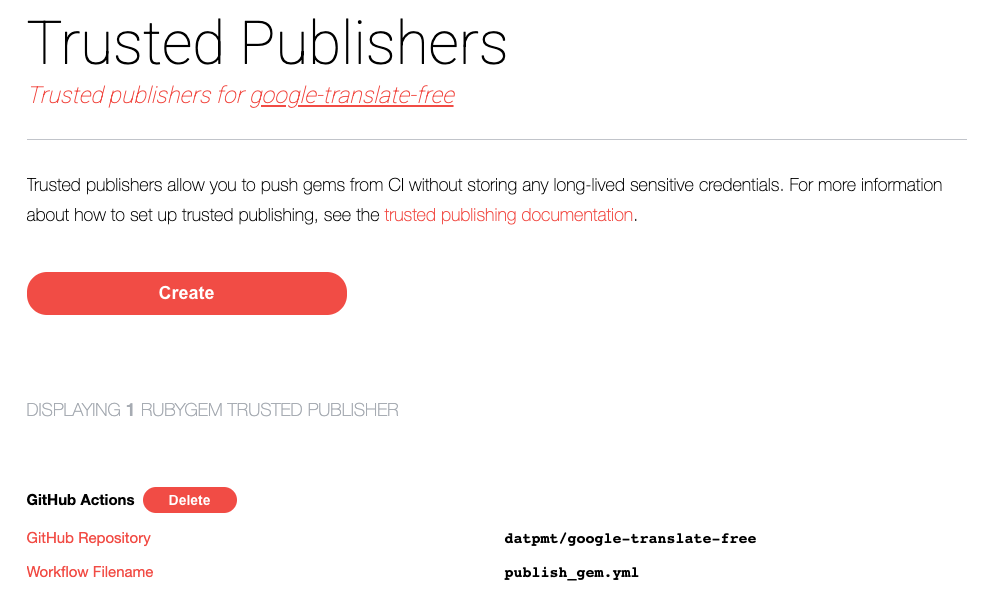
Once you click “Create Rubygem trusted publisher”, your publisher will be registered and will appear in the list of trusted publishers for this gem.

Now, the publish_gem.yml workflow on datpmt/google-translate-free will be able to generate short-lived API tokens from RubyGems.org that are able to push to this gem.
Now that you’ve created a Trusted Publisher.
Step 5: Publish Your Gem
Now you can proceed to publish your gem (Make sure update your version.rb file). You have two options for doing this:
- Push directly to the
mainbranch. - Create a Pull Request to
main.
Good Luck 
# References: